
I recently purchased the Panasonic DMC-FZ70. It’s a semi-DSLR camera with a non-detachable lens capable of some insane zooming. I mainly plan to use it to learn the basics of photography and see if I can get the hang of things.
The Basics
As I fiddled around with the options I discovered that 4 main attributes of the camera governed how the image appeared. The Focus distance, Aperture, Shutter Speed and ISO Sensitivity. In this post I will try to describe how I have understood these parameters for those impatient ones who have recently bought their DSLRs. I have omitted the Focus distance parameter for now as it needs a more elaborate post of its own, maybe for a later time.
Getting Started
For all the photographs I put my camera into the Manual Exposure mode, indicated by an M on its dial, along with Manual Focusing indicated by MF. This allowed me to tune all the 4 parameters mentioned above.
Noob Disclaimer
All the photographs attached in the post were taken by me. They are by no means optimal and an expert might have been able to produce much better photographs under identical conditions. The post only serves as an experiment to demonstrate the camera’s parameters.
The Aperture
Aperture describes the size of the hole which lets light into the camera sensor. The wider this opening, the more light will be let in, and the brighter the image will appear. The aperture is usually described by its f-Number, such as f/2.8, f/5.6 or f/8. This diagram (grabbed from Wikipedia) gives a nice representation of how the f-Number maps to the actual aperture of the camera.

Please do visit the Wikipedia Page for a detailed explanation of the f-Number. A higher f-Number means that the aperture is opened by a lesser amount, and thus lesser light is let in which eventually makes the image dimmer. For example, with all other parameters kept the same, a f/2.8 photo will be brighter than a f/8 photo.
The following 3 photos of Hibiscus flower in my garden, serve to illustrate the effect of Aperture. In the photos, the Aperture is indicated by the A abbreviation in the caption.
Effect of Aperture

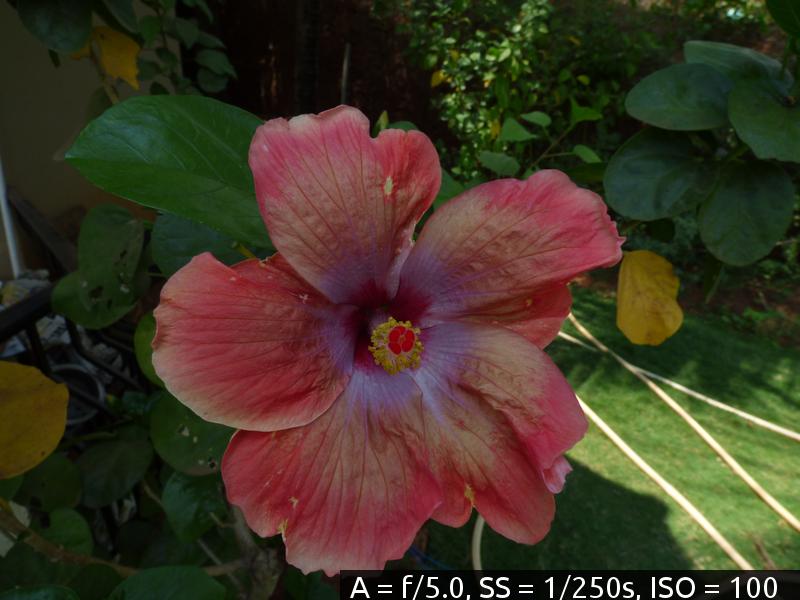

It’s clear from the above images that the lowest f-Number produces the brightest and in my opinion the best photo.
Shutter Speed
Shutter Speed is the amount of time the shutter of the camera stays open while capturing the image. Unlike the Aperture, which is indicated by an indirect measurement, the shutter speed is described by its exact duration, such as 1/10s (One tenth of a second or 100ms) or 1/500s (One Five-Hundredth of a second or 2ms). One obvious effect of the shutter speed is on the brightness. A faster shutter speed means less time for the light to form an image on the camera sensor and eventually a darker image.
Shutter Speed comes into play when the subject being photographed is moving. For example, if we are photographing a bird in motion with a shutter speed of 1/2s. Within the 1/2 second the image is captured, if the bird flaps its wings, the wings will leave a blurred artifact on the photograph. Generally speaking, for a crisp image, the shutter speed needs to be quicker than the time in which the subject can move significantly.
Effect of Shutter Speed
Below, I try to illustrate the effect of the shutter speed on the photographs of a spinning coin. In the captions, the shutter speed is abbreviated as SS.
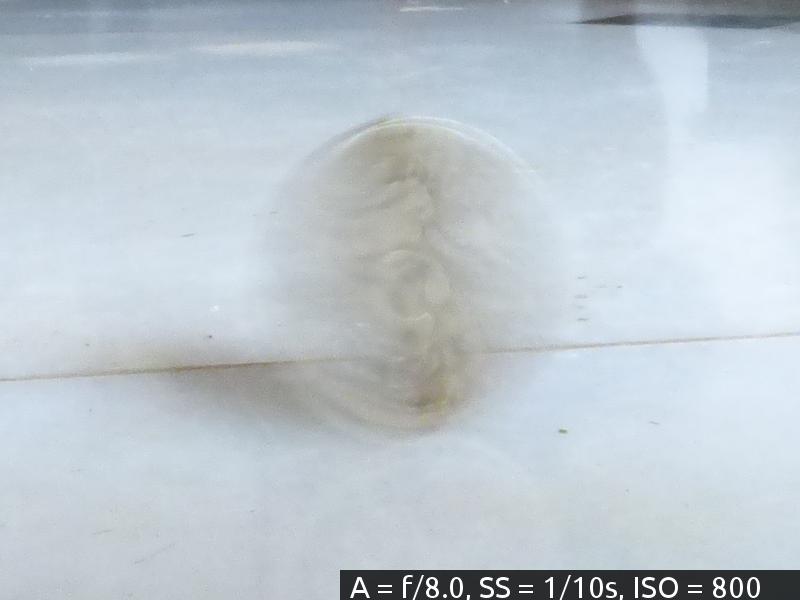


As observed, the spinning coin is simply too fast for the shutter speed of 1/10s. As we increase the shutter speed, the coin becomes less blurred, and finally, it is the most crisp as the shutter speed of 1/500s (2ms). Increasing the shutter speed also lets in less light. That’s the reason why I have compensated for it in the last image by increasing the ISO sensitivity.
ISO Sensitivity
The ISO Sensitivity governs how sensitive the camera’s image sensor is to light. A higher ISO Sensitivity amplifies the electrical signals produced by image sensor (this maps to the actual electrical gain in its transistors). In case you are wondering what ISO stands for, it is an abbreviation for International Organization for Standardization. Among other things, the organization has also standardized the sensitivity of camera image sensors. Hence the name ISO Sensitivity or simply the ISO. Increased ISO means a more bright image, keeping the other parameters constant. A high ISO is often used for indoor or low-light photography.
Below, I have tried to capture a Wooden Toy, which was made in my native town of Sawantwadi. The photos were taken indoors with the room illuminated only by a fluorescent light. The ISO Sensitivity is abbreviated by ISO in the captions.
Effect of ISO Sensitivity


As you can see, increasing the ISO produces a successively brighter image, with the highest ISO of 3200 producing the best image.
Conclusion
With the week I spent exploring my camera, I’ve learnt that photography as an art, requires not only sound technical judgment, but also an eye for creativity. Feel free to point out mistakes our potential improvements in the post. The piece of code I used to generate the caption can be found on this gist. All the original photographs are uploaded here, where you can see a detailed description containing all the camera parameters involved.
